Special thanks to the women at Nambour Hospital who were happy for these photographs to be taken during their caesarean section, and to the staff involved.
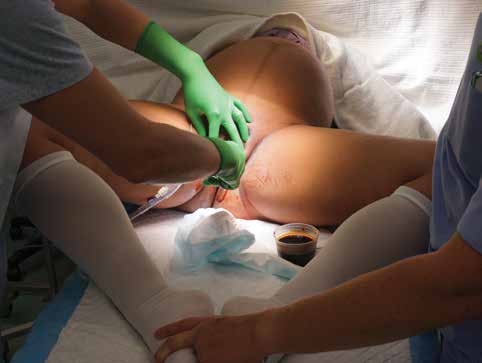
1. Preoperative steps: this patient was undergoing an emergency caesarean section. In this instance it is now our practice to prep the vagina with iodine solution. An IDC was already in situ as the patient had an epidural in labour. TED stockings have been placed on the patient for VTE prophylaxis.
 2. IV antibiotics: currently the Therapeutic Guidelines recommend 2 g IV Cephazolin as routine prophylaxis 15–60 minutes prior to skin incision.
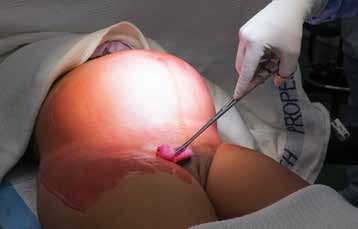
3. Skin preparation for caesarean section with chlorhexidine-alcohol prep, which should be allowed to dry prior to draping. It is important that solution does dry and doesn’t pool underneath the drapes, as this is a fire risk and patient burns have occurred previously.
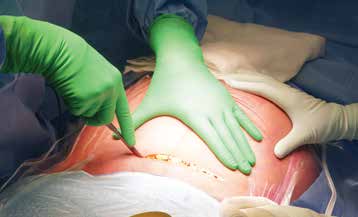
4. Skin incision: the Joel Cohen technique involves making a straight incision 3 cm below the level of the anterior superior iliac spines.
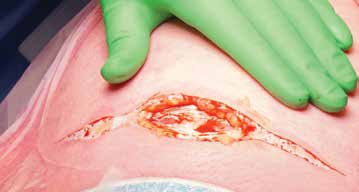
5. Entry technique: sharp entry through the skin, middle 3 cm of the subcutaneous fat and rectus sheath is demonstrated here.
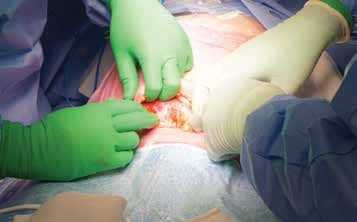
6. Blunt extension of the subcutaneous tissue and rectus sheath.
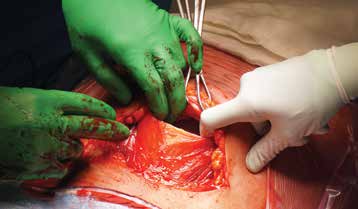
7. Blunt entry into the peritoneal cavity is used as a part of the Joel Cohen caesarean section technique. This should be done high in order to avoid entering into the bladder, which may be high following prior CS or in the advanced stages of labour.
a
b
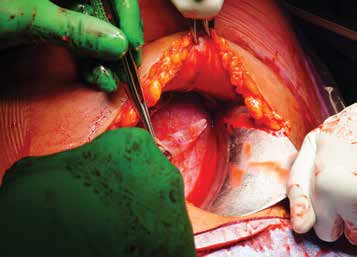
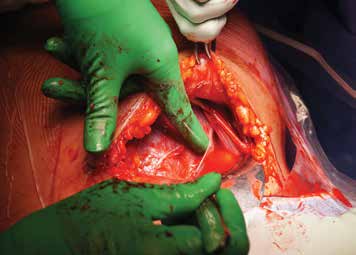
8a (top) & 8b (bottom). Creation of a bladder flap. The loose utero-vesical peritoneum is identified. It should be opened approximately 2 cm below the level of its fixed attachment to the uterus in the midline and extended laterally each side. The peritoneum can then be picked up with forceps and the bladder gently separated from the lower segment bluntly with the forefinger, or in the presence of adhesions sharply reflected down.
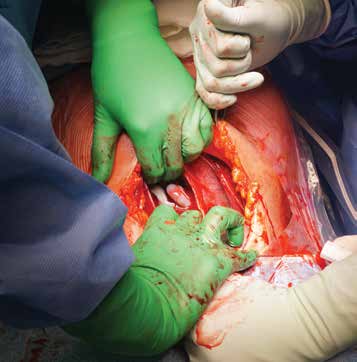
9. Uterine entry: this demonstrates cephalad-caudad blunt extension of the uterine incision performed after making a small 2–3 cm horizontal sharp incision on the lower uterine segment.
a
b
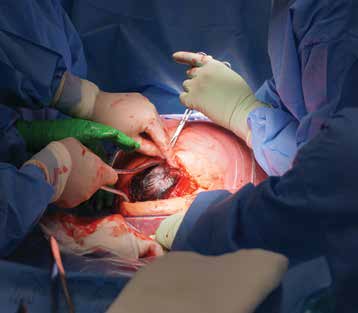
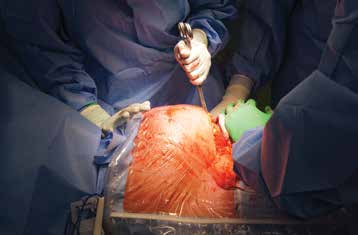
10a (top) & 10b (bottom). Delivery of the fetal head is usually achieved with flexion and elevation of the fetal head toward the uterine incision, and then completed with the addition of the assistant giving fundal pressure (10b). In photo 10a, forceps delivery of the fetal head is demonstrated, which may be necessary in the elective setting where the fetal head can still be high.
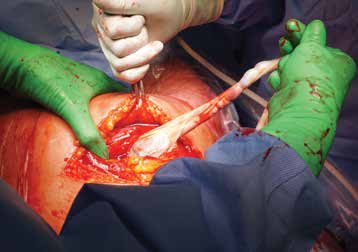
11. Spontaneous delivery of the placenta: fundal massage and controlled cord traction are being used here to achieve spontaneous delivery of the placenta.
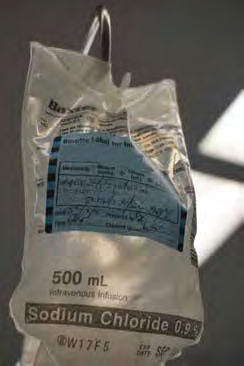 12. An oxytocic is usually given following the delivery of the baby to reduce the risk of PPH, and here is shown an oxytocin infusion, as is current evidence-based practice.
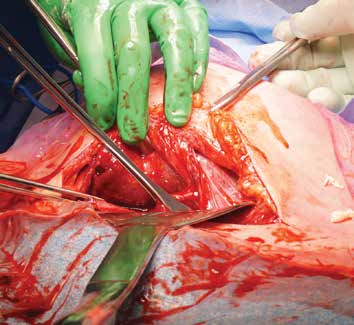
13. Identifying the uterine incision and uterine angles: it is useful to place Green-Armytage forceps on the upper and lower edges of the uterine incision to ensure they are identified correctly (particularly the lower edge, which can at times recede inferiorly and be difficult to identify because of bleeding, which has led some to mistake the posterior wall of the lower segment for the lower edge of the uterine incision). This practice also allows clear identification of the uterine angles that are often secured first.
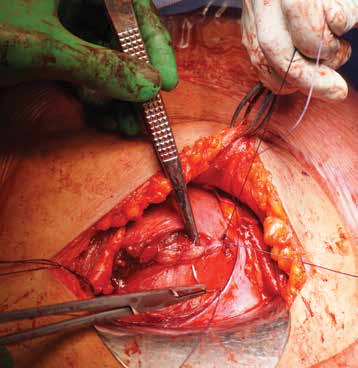
14. Closure of the uterus: here the uterus is closed with a double-layer, non-locking continuous monofilament (1 monocryl) suture. The first layer should include the cut edge of the myometrium and achieves haemostasis. The second layer pulls uncut myometrium together in order to cover the first layer.
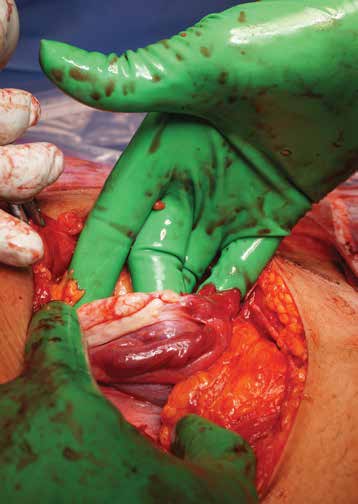
15. Checking the tubes and ovaries should be done routinely at caesarean section, so as not to miss any adnexal pathology.
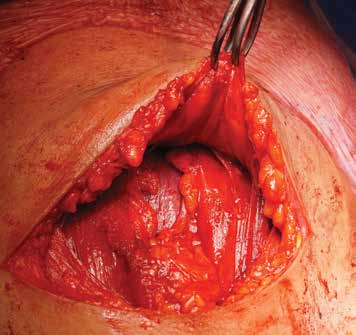
16. Non-closure of the peritoneum. Haemostasis between the rectus sheath and muscle should be checked at this point because of the risk of injury to perforating vessels during entry.
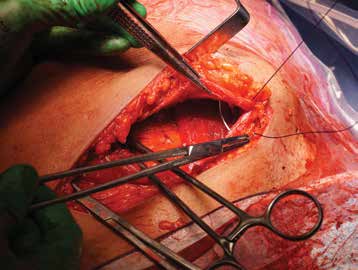
17. Rectus sheath closure is demonstrated here with a 1 PDS suture, using a continuous non-locking technique.
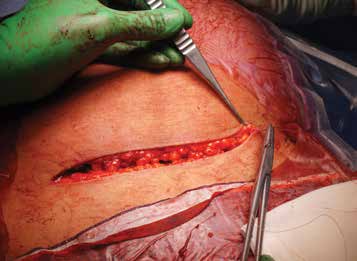
18. The subcutaneous fat in this instance has not been closed as it is less than 2 cm. A continuous subcutaneous suture is used for skin closure.



thanks for what an excellent explanation.
May the almighty God up there bless all the doctors world wide,
Be blessed Ladies and gentlemen
❤️.
Very nice of explanation
good job
What a splendid and very comprehensive explanation
Deeply appreciated
Nice and simply e3xplained… i wish to receive video of basic obsgyn emergency surgeries as well as electives… This should be well explained stepwise too….
Excellent
Excellent lscsinformation and procedure
Great and detailed explanation. It’s safe to mention that the bladder should be retracted with a Doyen’s retractor after entry
so true
Thanks for the steps. Very clear. But is the uterus no longer exteriorized if possible after delivery of the placenta? In my center the uterus is cleaned with a sterile mop following delivery of the placenta. A Doyens retractor is used to retract the bladder during closer. It’s also used to inspect the closed uterus for bleeding following reperitonization of the uterus, since at this point the relaxed vessels can still bleed.
How many layers are there?
Excellent explanation. Thank very much!
Insightful
Thanks for the clear step by step explainations.
But is it not necessary to Catetherize the patient prior to the onset of the procedure?
Great explanation, it’s straightforward and simple to follow
Vedio of surgery wish to see
yes i want to see close view of all steps
Very nice
yes please
Very insightful. Video access will be invaluable
This is awesome
wow
a well demostrated protol for C/S. thank you
well explained… thank you!
wow, this is really some good piece of work and information. thank you so much to everyone that took part in creating this work and all persons that were involved. a big thanks
well demonstrated surgical procedure. Thanks.
Thank you so much for these informations.It is highly useful for my study.
Good effort
thanks, excellent add steps cutting rectus, peritoneum
Loved it… I’m a first year intern it helped. Short answer simple, straight to the point
Thank you so much for the information you provided .It is highly useful for my study as a doula
[…] Caesarean section: step by step […]